A Celeb Makeup Artist Broke Down the Best Way to Apply Eye Shadow (Plus What Not to Do)
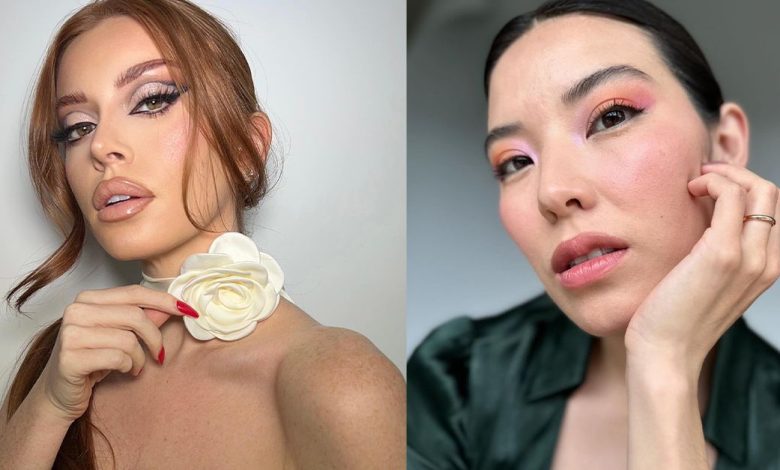
Sometimes, creating the perfect eye shadow look is easier said than done. It’s easy to scroll through Pinterest, looking up makeup inspiration for a date night or boozy brunch. The hard part comes when we try to replicate them without the right techniques, products, and plenty of practice. Thankfully, we have a number of industry experts on speed dial who can point us in the right direction!
For us to better understand how to master applying eye shadow for a perfect finish, we reached out to celebrity makeup artist Tomy Rivero for guidance. So before you reach for your favorite cream, powder, and liquid eye shadows, keep scrolling to learn the best way to apply your products and step-by-step guides for how to pull off three eye makeup looks that continue to dominate our For You pages. Plus, find the best editor-selected eye shadows to bring them to life.
How to Create an Eye Shadow Look
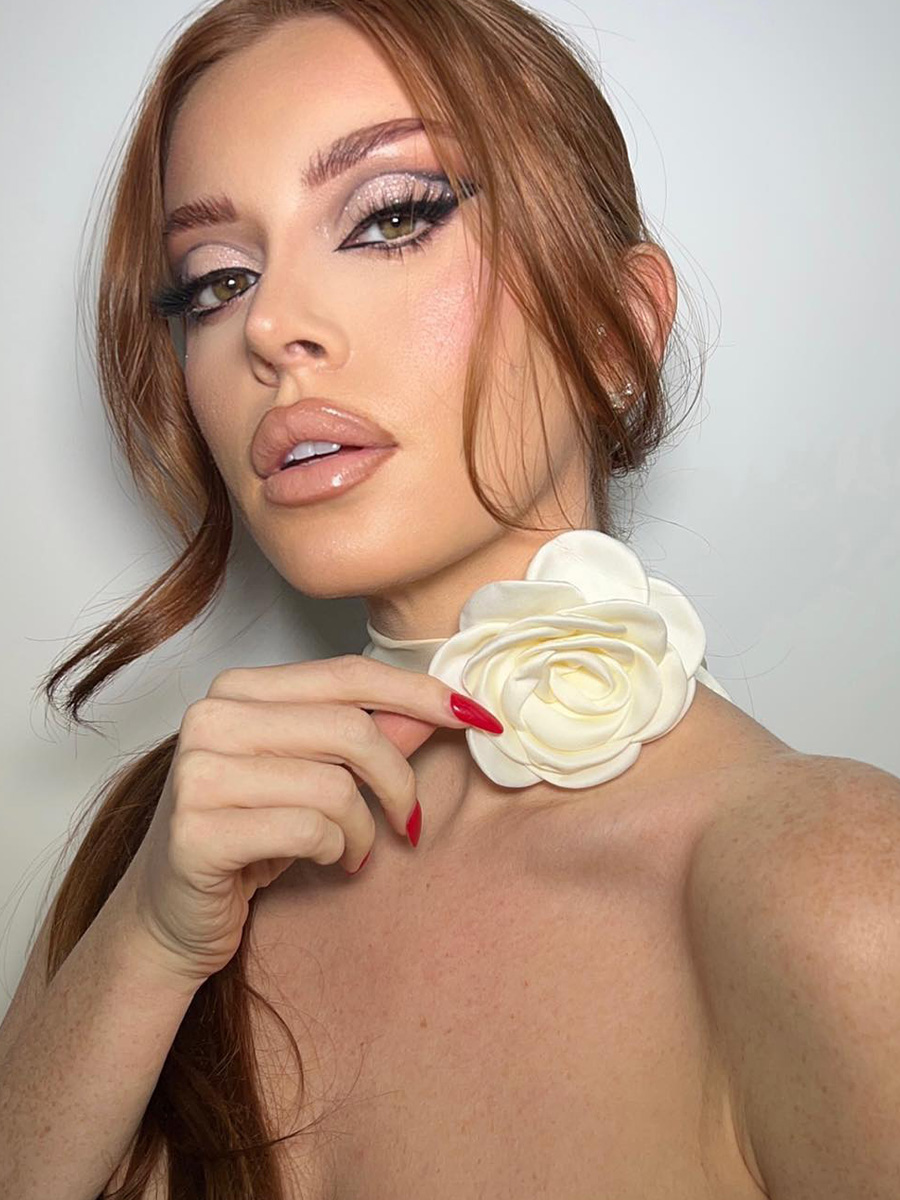
There no “right” way to go about applying your eye shadow, but you can pull off the look of your dreams with the right process and products in tow. As a professional makeup artist, Rivero has a process of mapping out makeup looks for his celebrity clientele that may differ from how a makeup newcomer may go about an everyday look, but it’s always smart to think ahead before you dip into your eye shadow palette. “My process for mapping out the look is more of a color test—I do small swatches of all of the eye shadows where I want to place them to see how the colors will look with the finished look,” he says.
Additionally, if you’re trying to something new with your eye shadow, Rivero shares that the best way to determine if they’ll work is by wearing them for a few hours. He suggests trying the look on a day before you wear it outside. To do this, the makeup artist encourages priming the lid with a concealer or eye shadow primer “to get the most accurate idea as to what the colors actually look like on your skin.” Pay attention to its wearability as well as if the product will crack, move, run, or disappear. To avoid making mistakes, take note of what works and what doesn’t.
Achieving Flawless Eye Shadow Application
For those new to the world of using eye shadow, Rivero’s biggest advice is to remember that paint and powder can always be brought down or removed for a fresh start. “The placements of your eye shadows doesn’t have to change much once you have figured out what you like and what works on your eye shape,” he adds. More than anything, Rivero encourages makeup newcomers to adjust any look to the way that works for them.
To prevent your eye shadow from shifting, Rivero recommends investing in a good primer to set everything in place and extends the wear time of your eye makeup. He also shared a few ways to combat fading and fallout. “For fallout, a good trick is to fold a tissue under the eyes as you apply the shadow. The paper will catch any powder products,” he says. This is especially important if your prefer to do your foundation and base first.
’90s-Inspired Smoky Eye
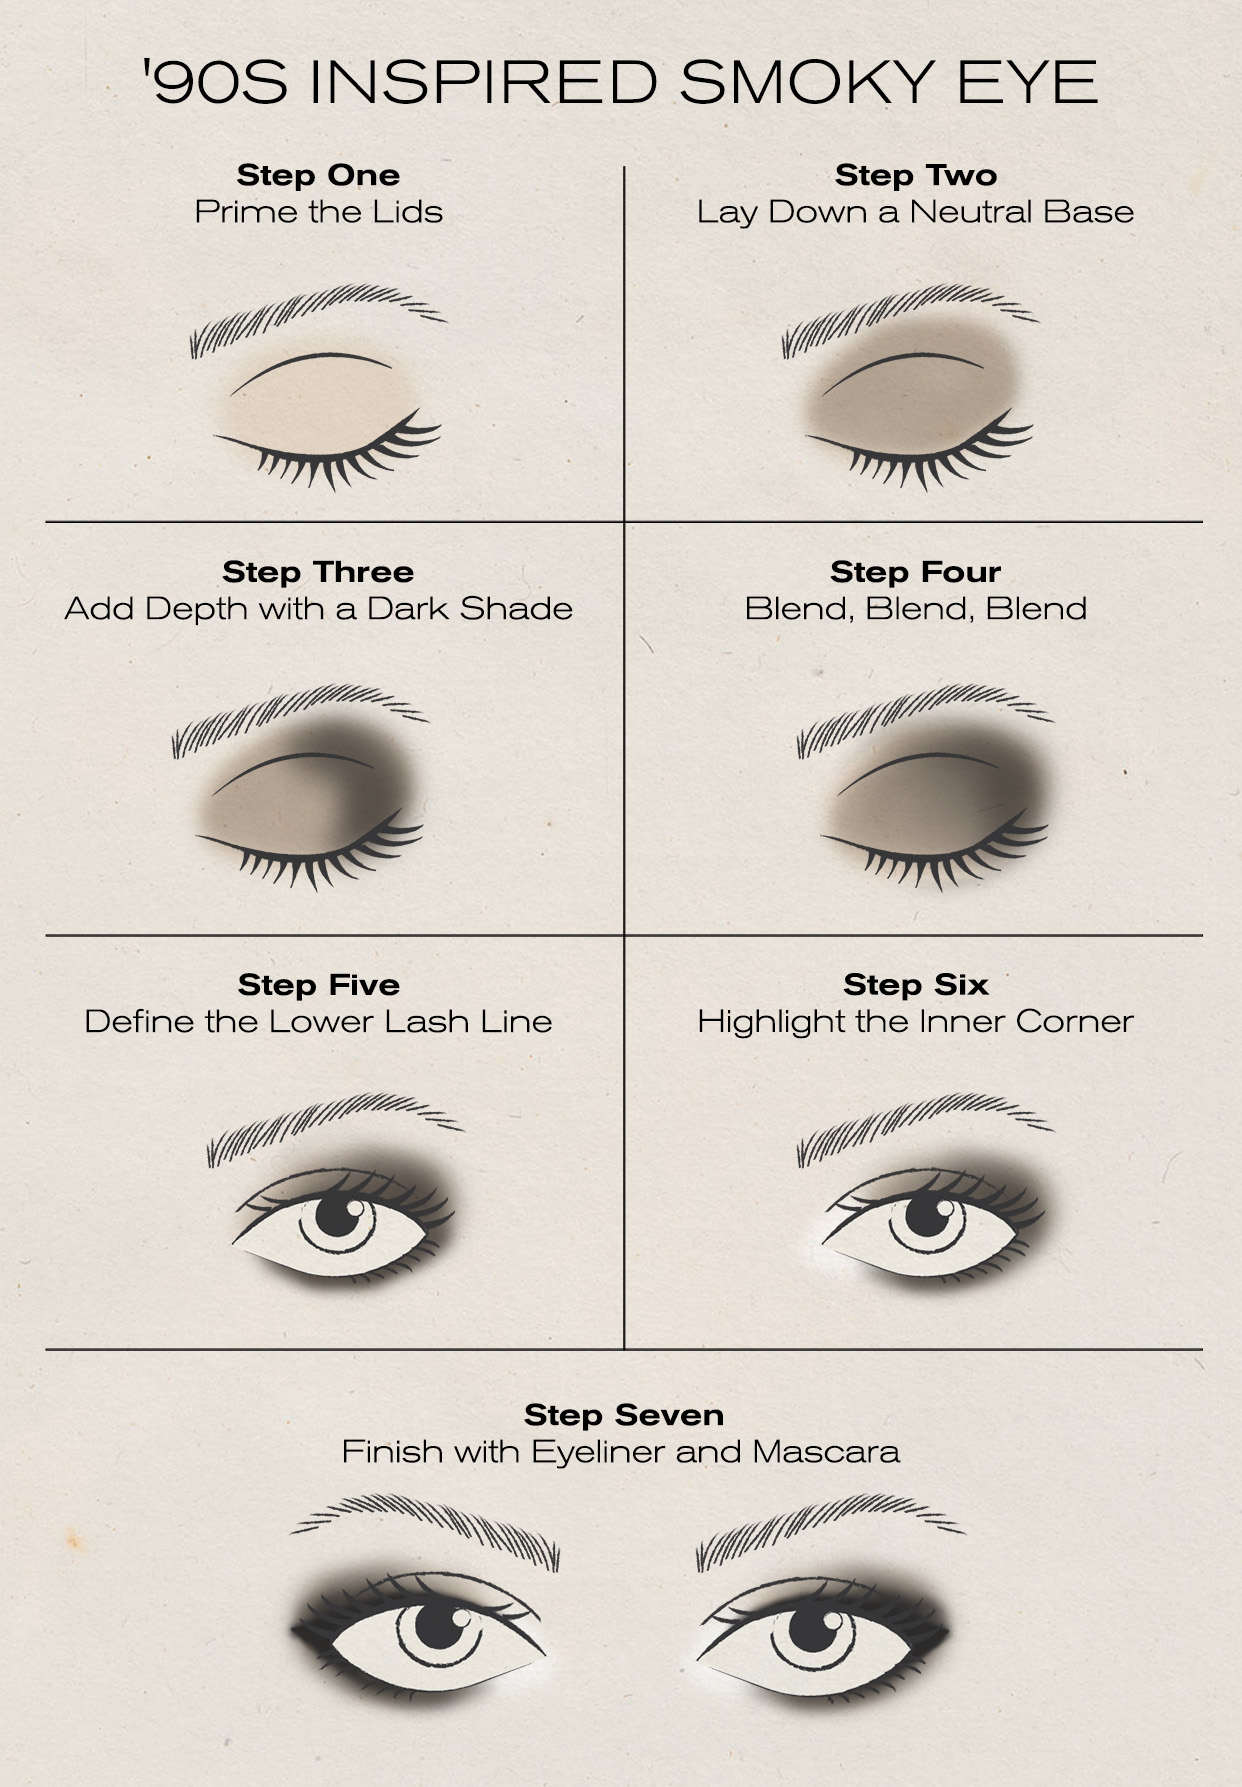
- Prime the Lids: Use an eye shadow primer or a concealer to make the eye shadow last longer.
- Lay Down a Neutral Base: Sweep a matte neutral shade over the lid and up to the brow bone to set the primer.
- Add Depth With a Dark Shade: With a matte dark brown or black color, focus on the outer corner of the eye, blending it toward the crease and inward for a smoked effect.
- Blend, Blend, Blend: Use a clean blending brush to soften edges, making sure there are no harsh lines.
- Define the Lower Lash Line: Apply the dark shade along the lower lash line and blend out
- Highlight the Inner Corner: Add a touch of light shimmer or a light matte shade to the inner corner to brighten.
- Finish With Eyeliner and Mascara: Apply a thick black eyeliner along the upper lash line and finish with mascara for a true ’90s look.
Classic Cut Crease
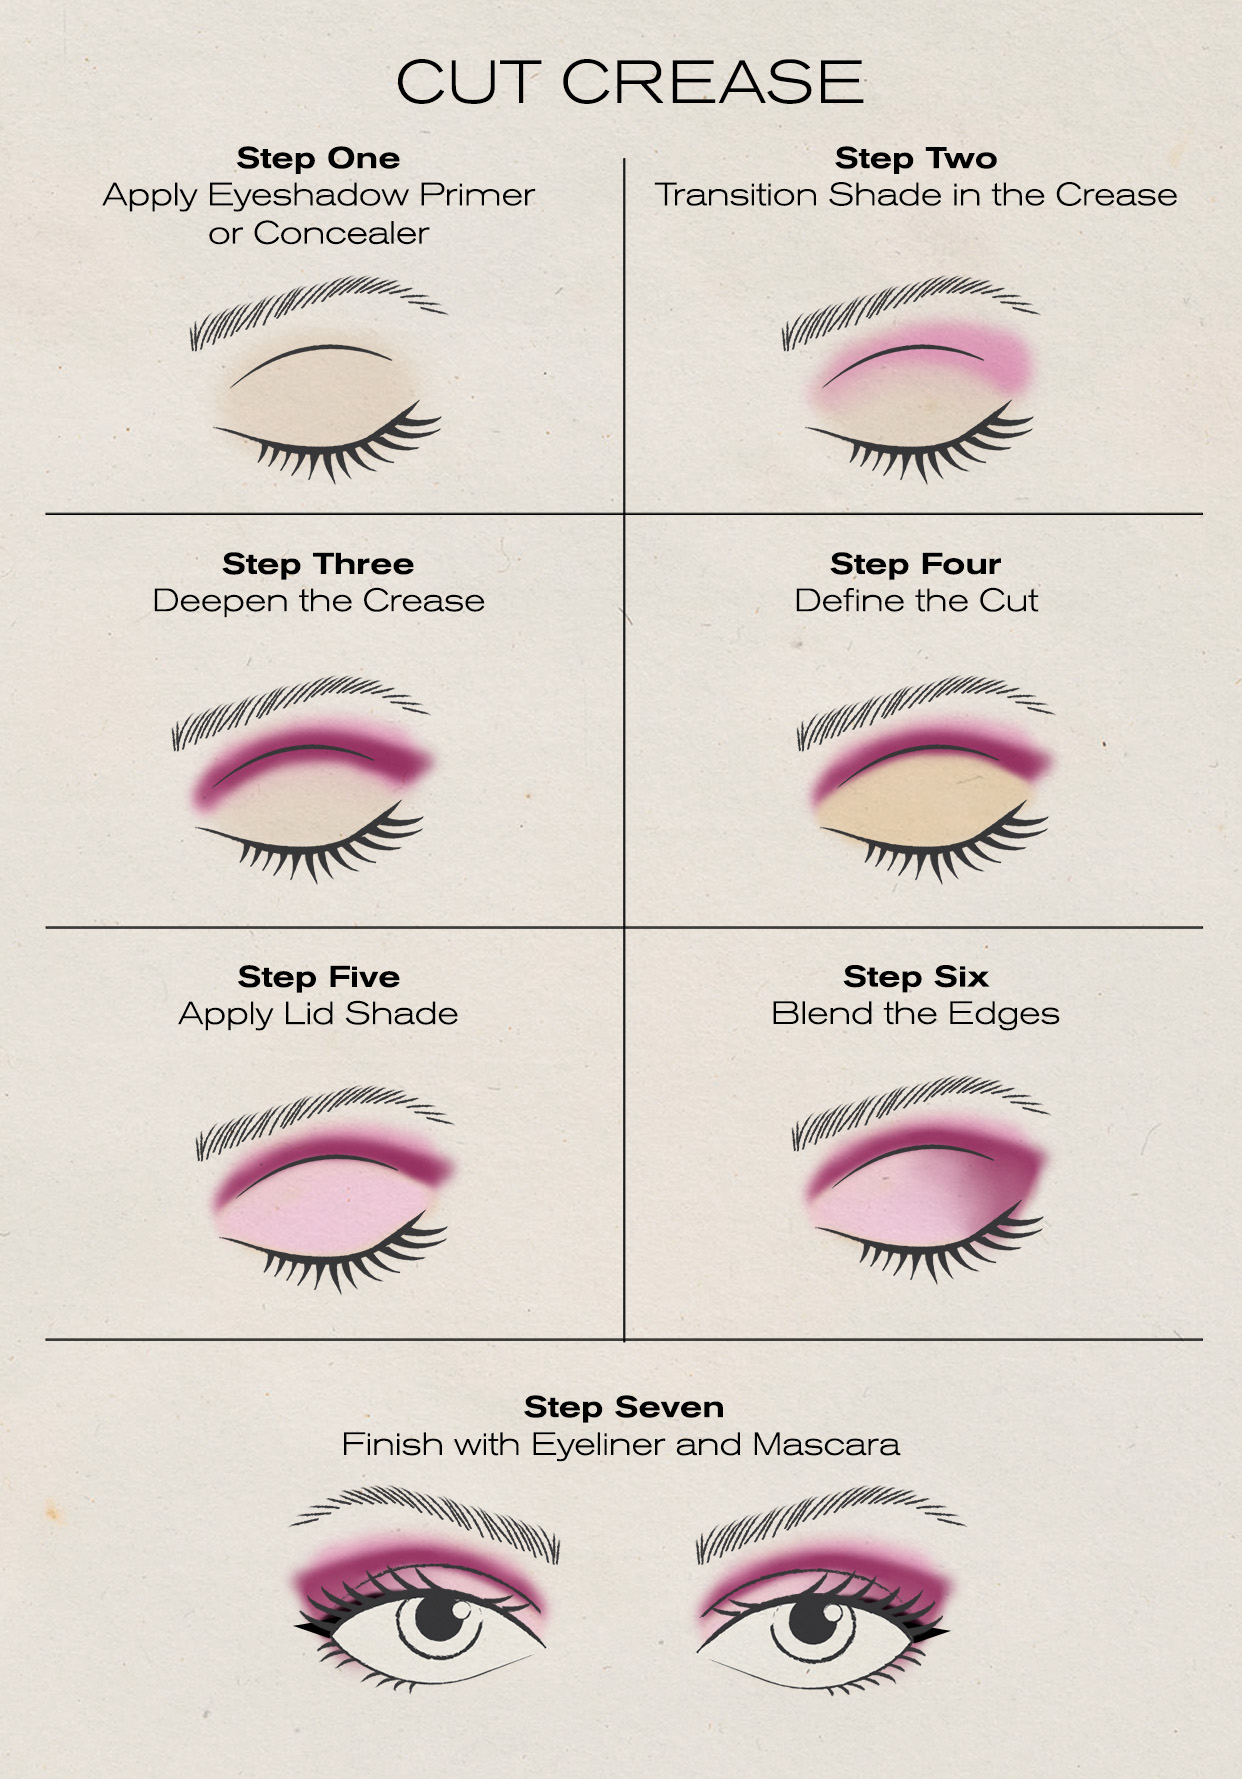
- Apply Eye Shadow Primer or Concealer: Create a base to make the eye shadow pop and stay in place.
- Transition Shade in the Crease: Use a warm mid-tone shade in the crease and blend out.
- Deepen the Crease: Use a darker shade directly in the crease to add depth, blending upward.
- Define the Cut: With a small brush and concealer, carve out the crease from the inner corner to the middle or end of the lid.
- Apply Lid Shade: Pat a shimmery or matte color over the area where you applied concealer for a defined look.
- Blend the Edges: Use a small amount of the crease color to blend where the cut crease meets the outer edge for a seamless transition.
- Finish With Eyeliner and Mascara: Trace a winged or thin eyeliner and finish with mascara for a clean, dramatic effect.
Gradient Glam Look
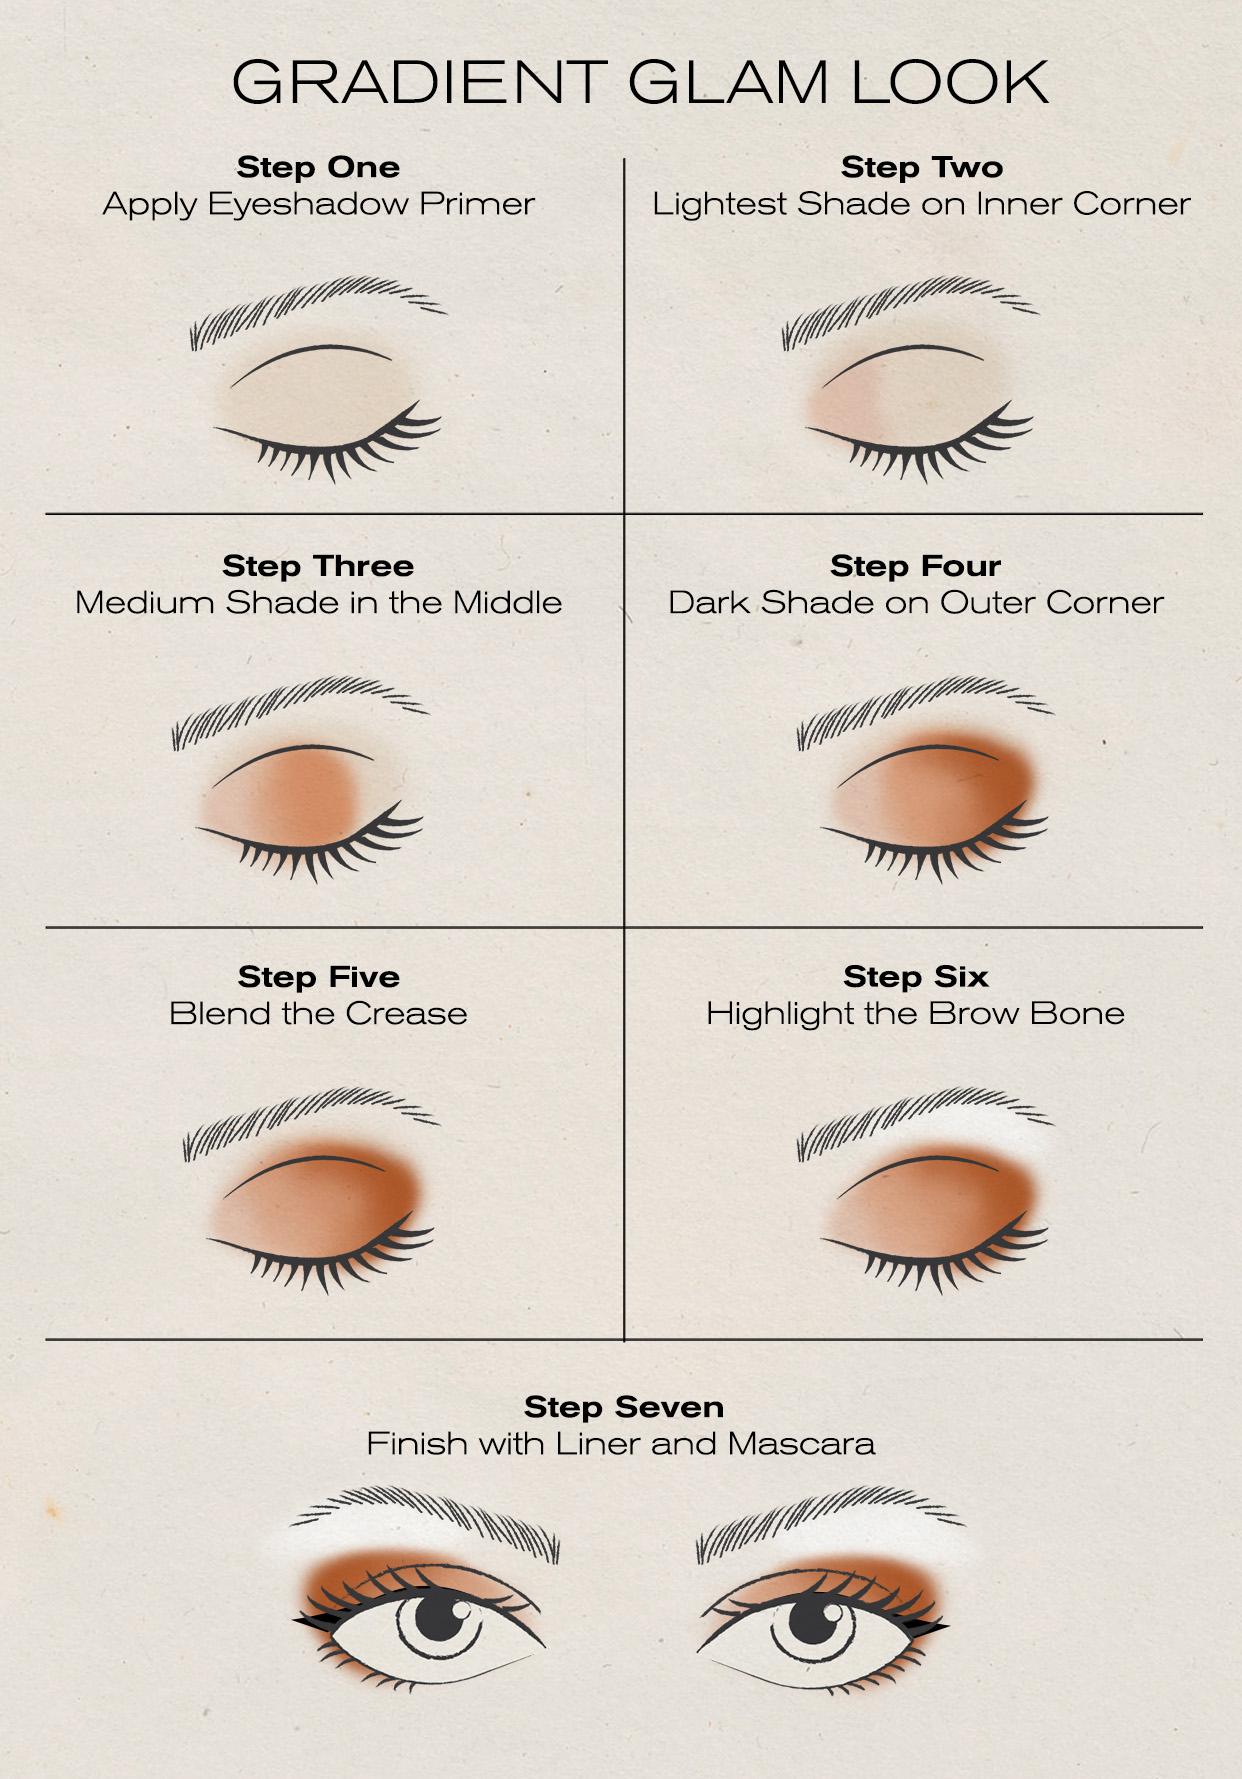
- Apply Eye Shadow Primer: Apply primer to make sure the colors are vibrant.
- Lightest Shade on Inner Corner: Begin with the lightest shade on the inner corner of your eyelid.
- Medium Shade in the Middle: Apply a medium-tone shade in the center of the lid, blending into the light shade for a seamless gradient.
- Dark Shade on Outer Corner: Place a darker shade on the outer corner and blend it into the middle shade for a gradient from light to dark across the lid
- Blend the Crease: Use a clean blending brush to smooth out the crease, ensuring the gradient is even.
- Highlight the Brow Bone: Add a touch of a light shade to the brow bone to lift the eye area.
- Finish With Liner and Mascara: Apply subtle eyeliner and a coat of mascara to complete the glam look.
Eye Shadow Palettes
Liquid Eye Shadows
Eye Shadow Sticks
More Eye Shadow Favorites
Explore More:
Source: WhoWhatWear
Related Posts
- 5 foods you must have if want Korean Glass Skin
- I Asked the Coolest People I Know: What Makes an It-Girl Lip Balm?
- 7 hairstyles for women popular in 2025 weddings
- 12 Coconut Perfumes That Smell Like an Expensive Vacation (and Not Sunscreen)
- The 6 Hats Everyone Will Be Wearing Instead of Bucket Hats This Summer

